
Hey Champs! You can distribute your added social media accounts into different Workspaces. Creating Workspaces will help you streamline and manage your tasks more easily and efficiently.
In this guide, you can learn how to manage a Workspace in your Social Champ account. You can find the guide here if you want to create a new Workspace.
Manage Workspace
Let’s get started with how to manage the workspaces.
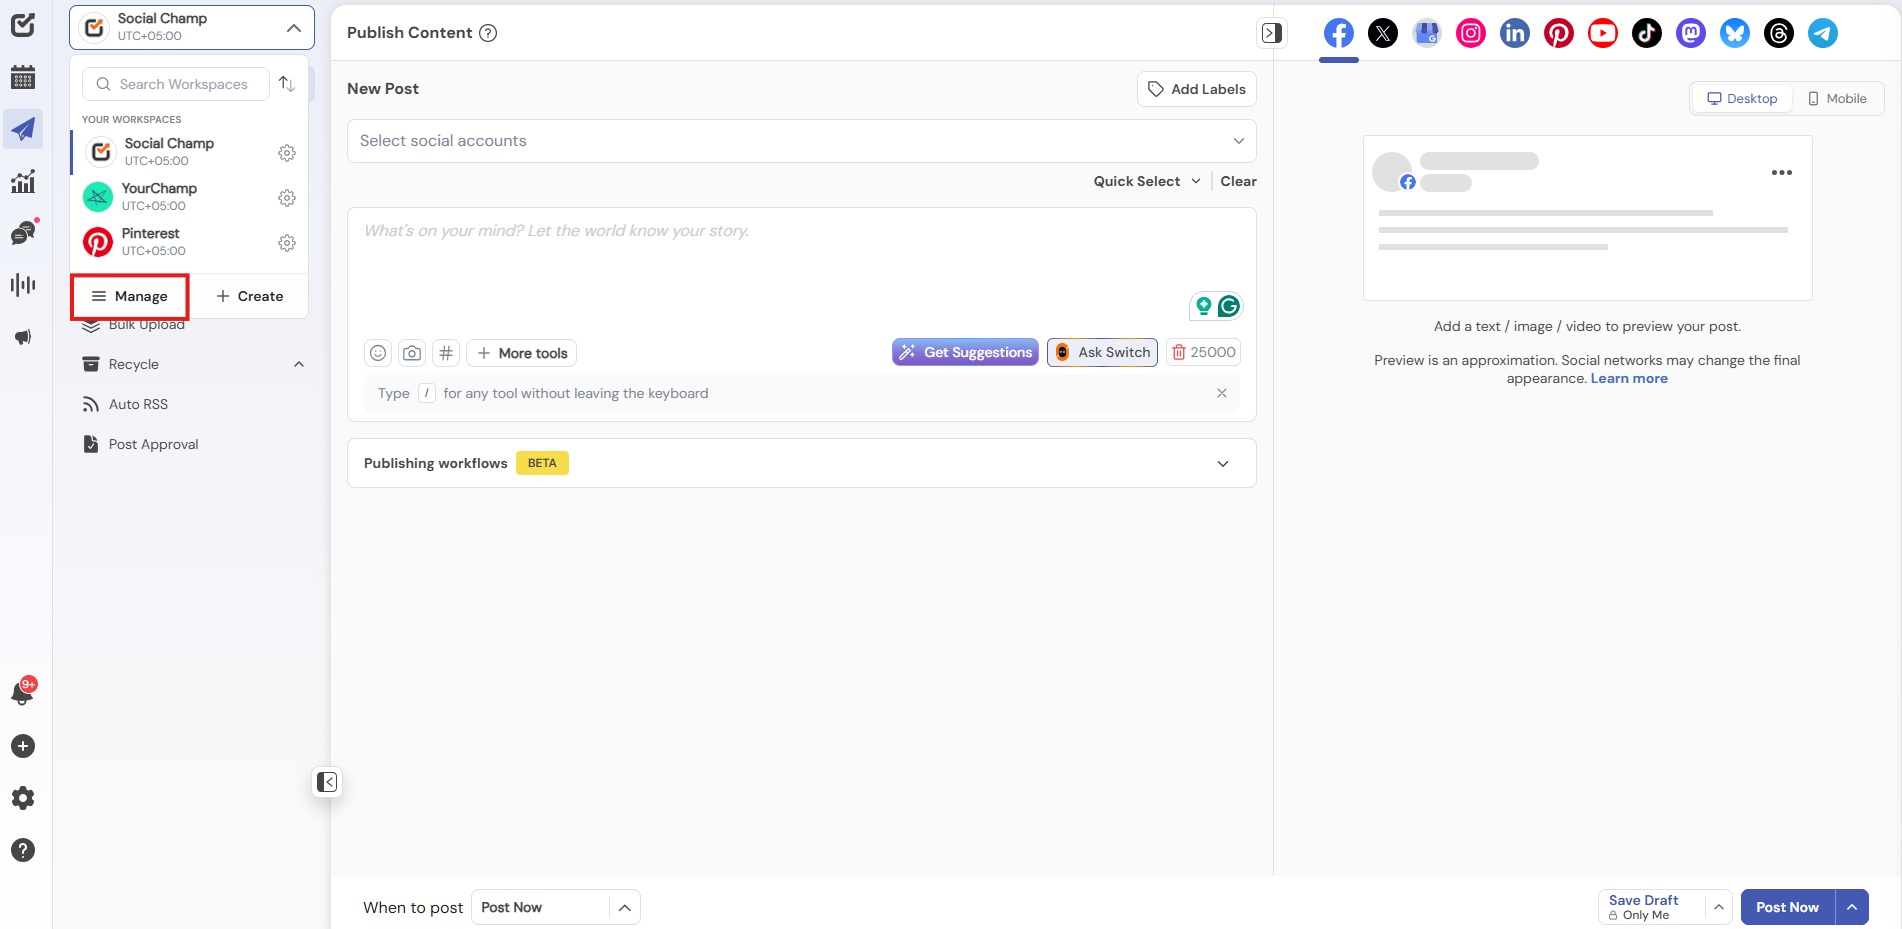
- You will land on the content dashboard by default when you first log in to your Social Champ account. Drag your cursor to the top-left of the screen and click the Workspace drop-down.
- Click the ‘Manage’ option.
- Here, you can see all your already-created Workspaces with their information displayed in each column.
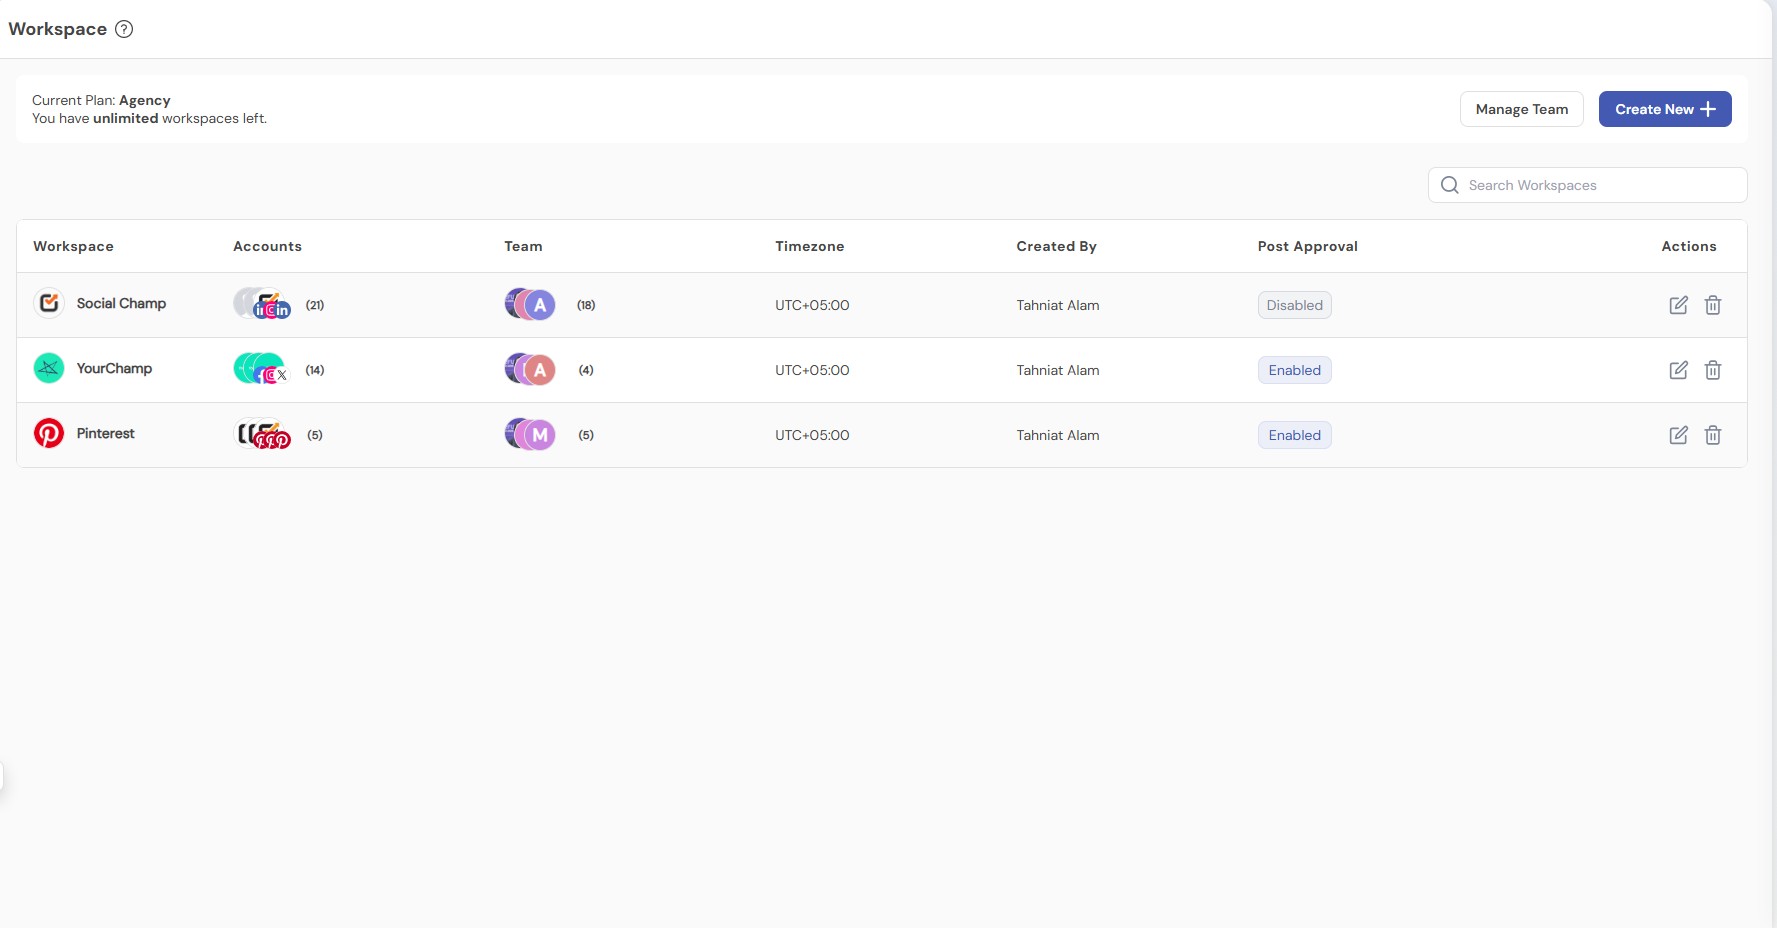
From left to Right, you can see,
* Name of the Workspace
* Number of accounts in each Workspace
* Team member specified to the Workspace.
* Time zone
* Created by
* Post Approval
* Action Button
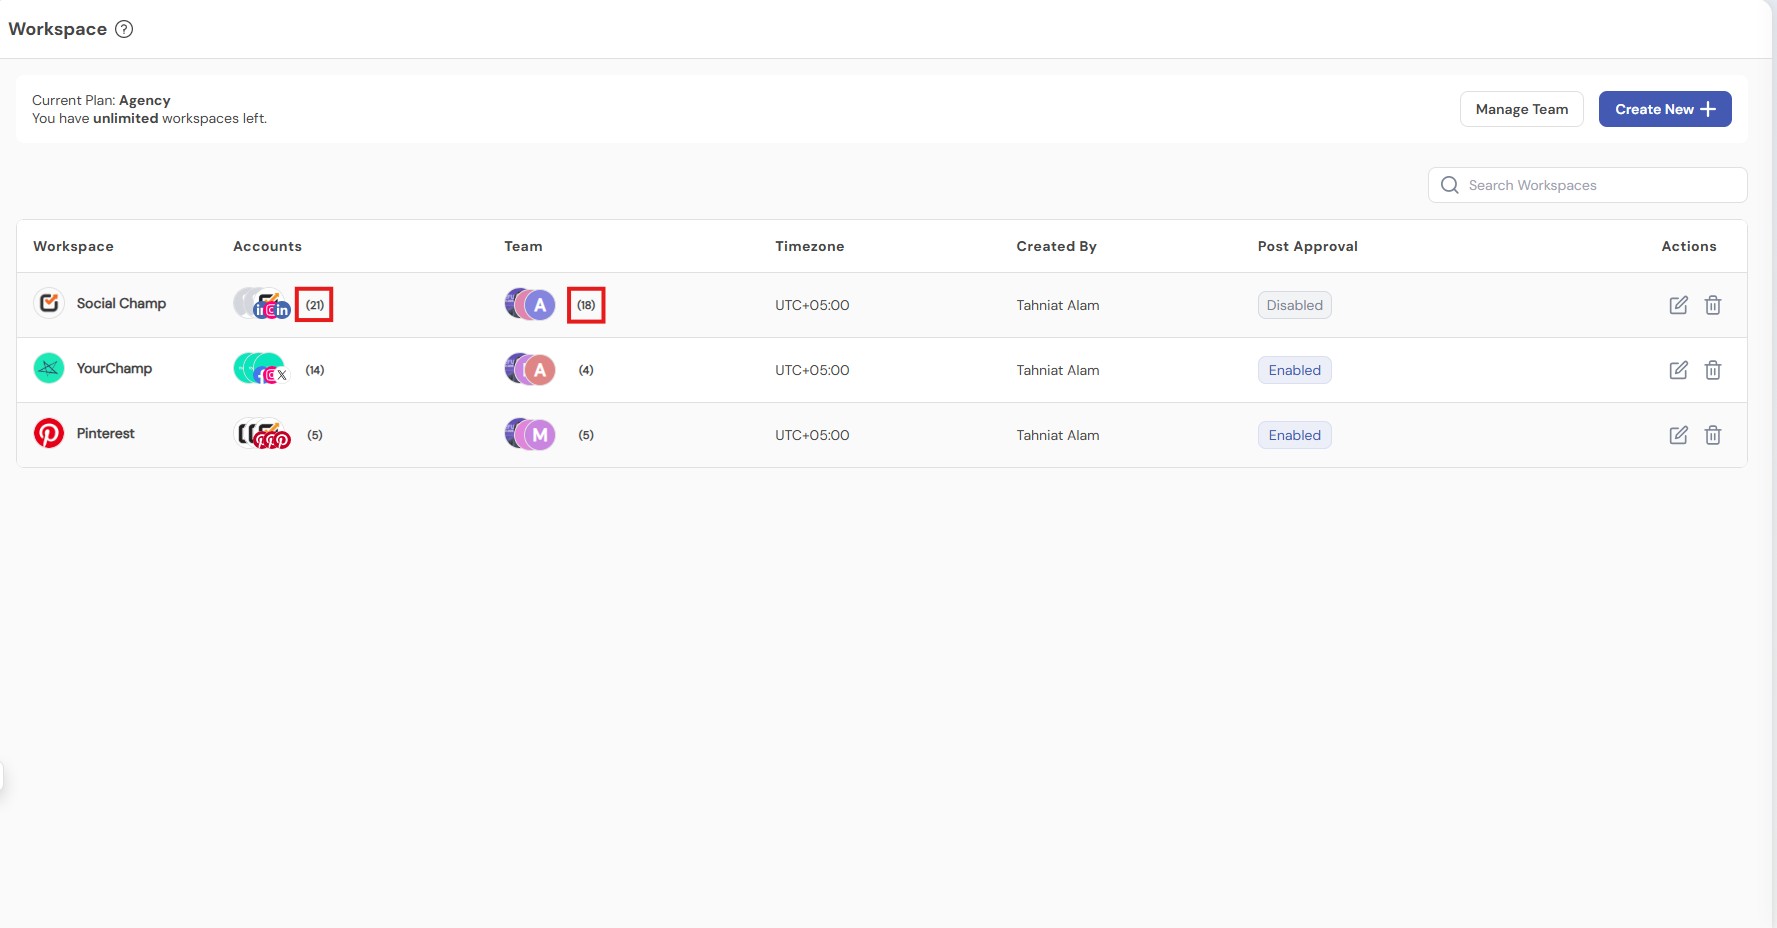
- By clicking the number next to Accounts and Team Members, you can see all the accounts and team members added to this specified Workspace.
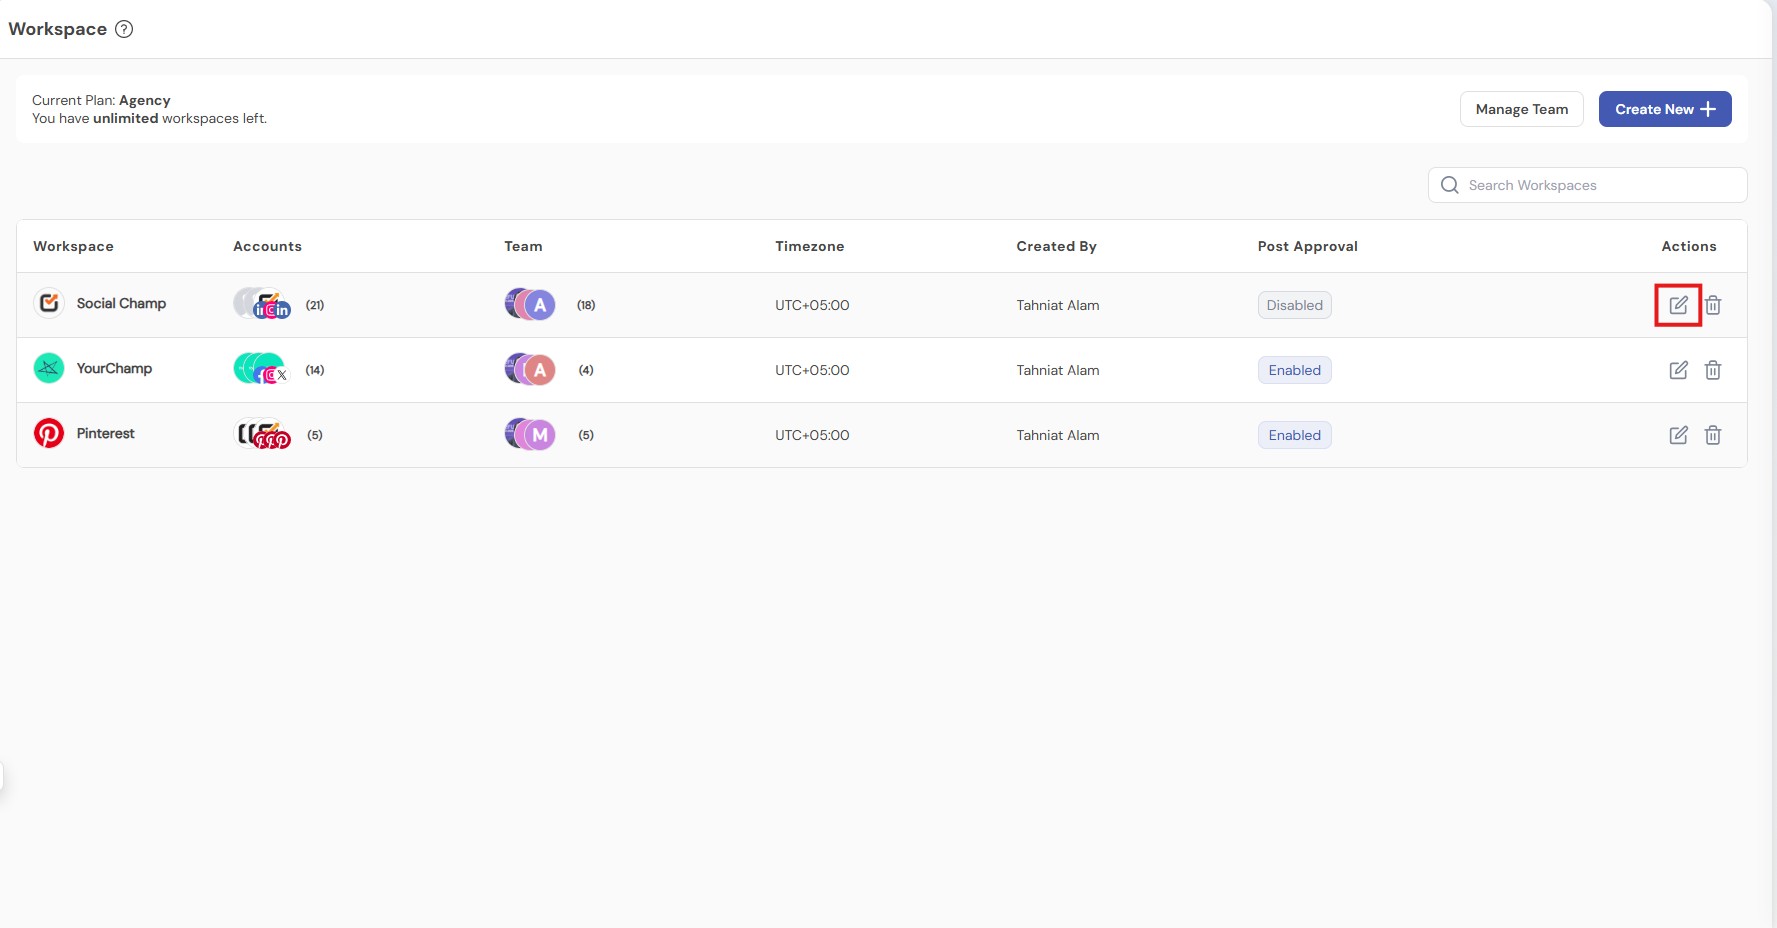
- To make changes in the Workspace, click the ‘edit button’ under the Action column.
- Now, you will land on the ‘Edit Workspace’ page. Let’s see a step-by-step procedure for editing a Workspace.
- You can change the name and time zone of your Workspace from the drop-down, based on your preference or target audience. You can also change the picture, Time format, and Calendar start day as needed. You can also enforce Two-Factor Authentication (2FA) for All Workspace Members by toggle on this.
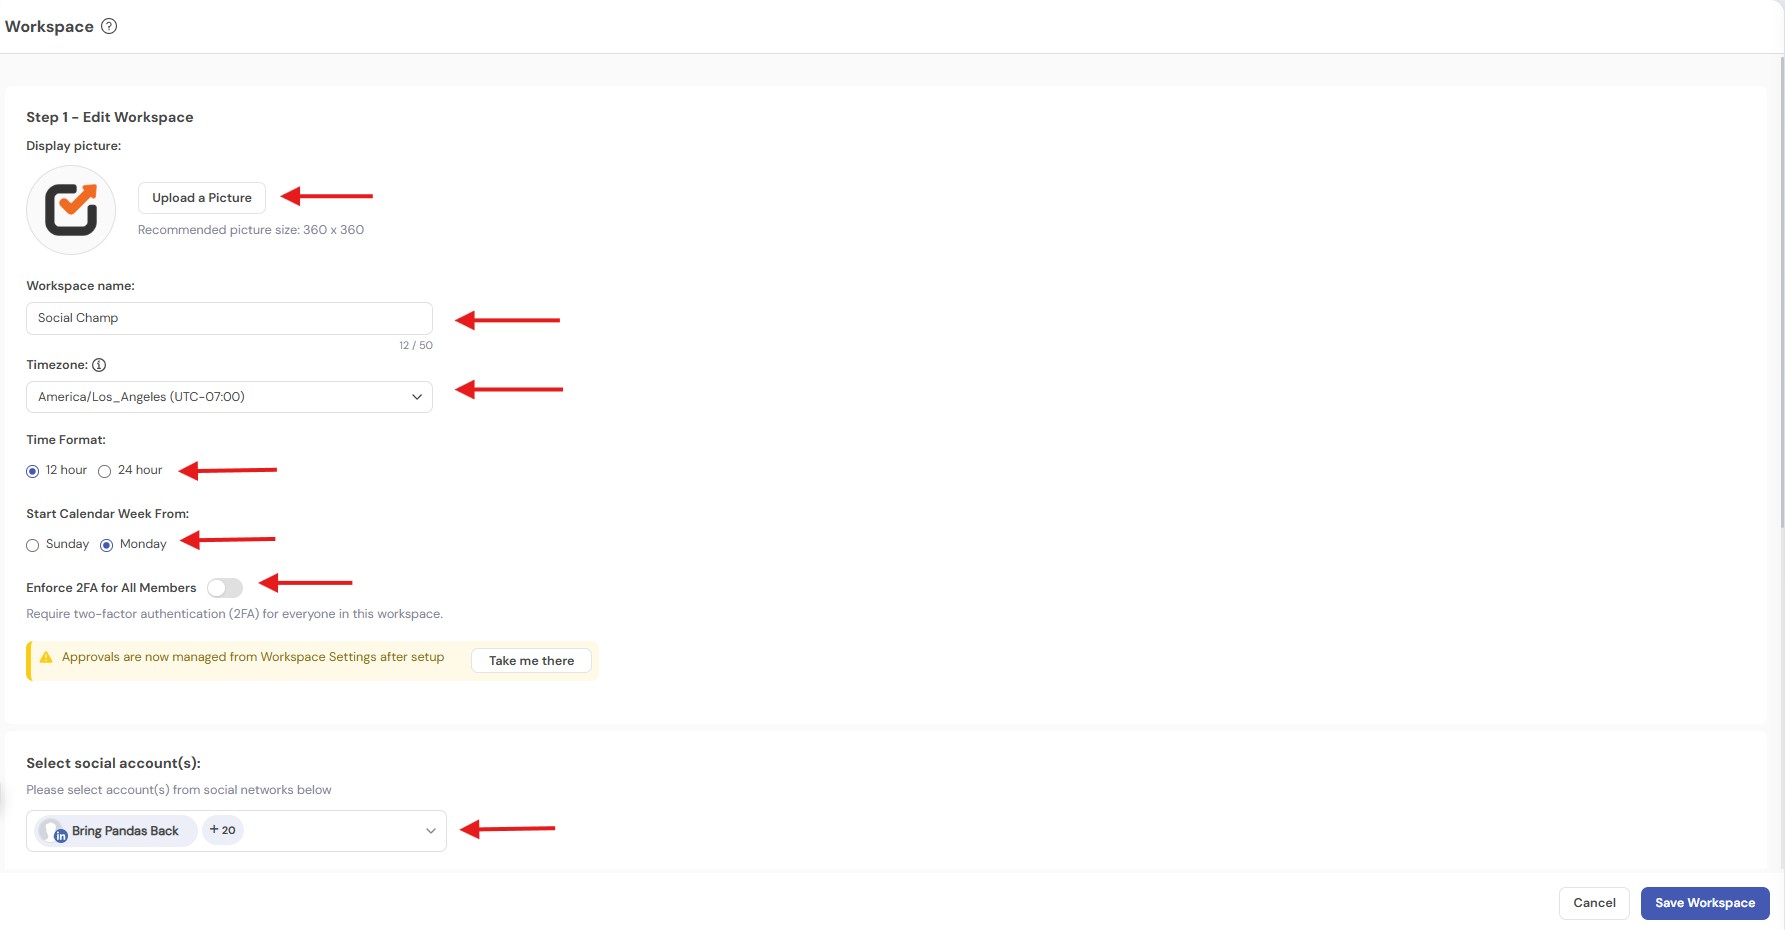
- Click the box to open a drop-down menu where you will first see a list of all your Social Media accounts connected with Social Champ and the Workspace they’re added to. If you scroll down, you will see a list of all the Social Media accounts added to the Workspace you’re currently editing.
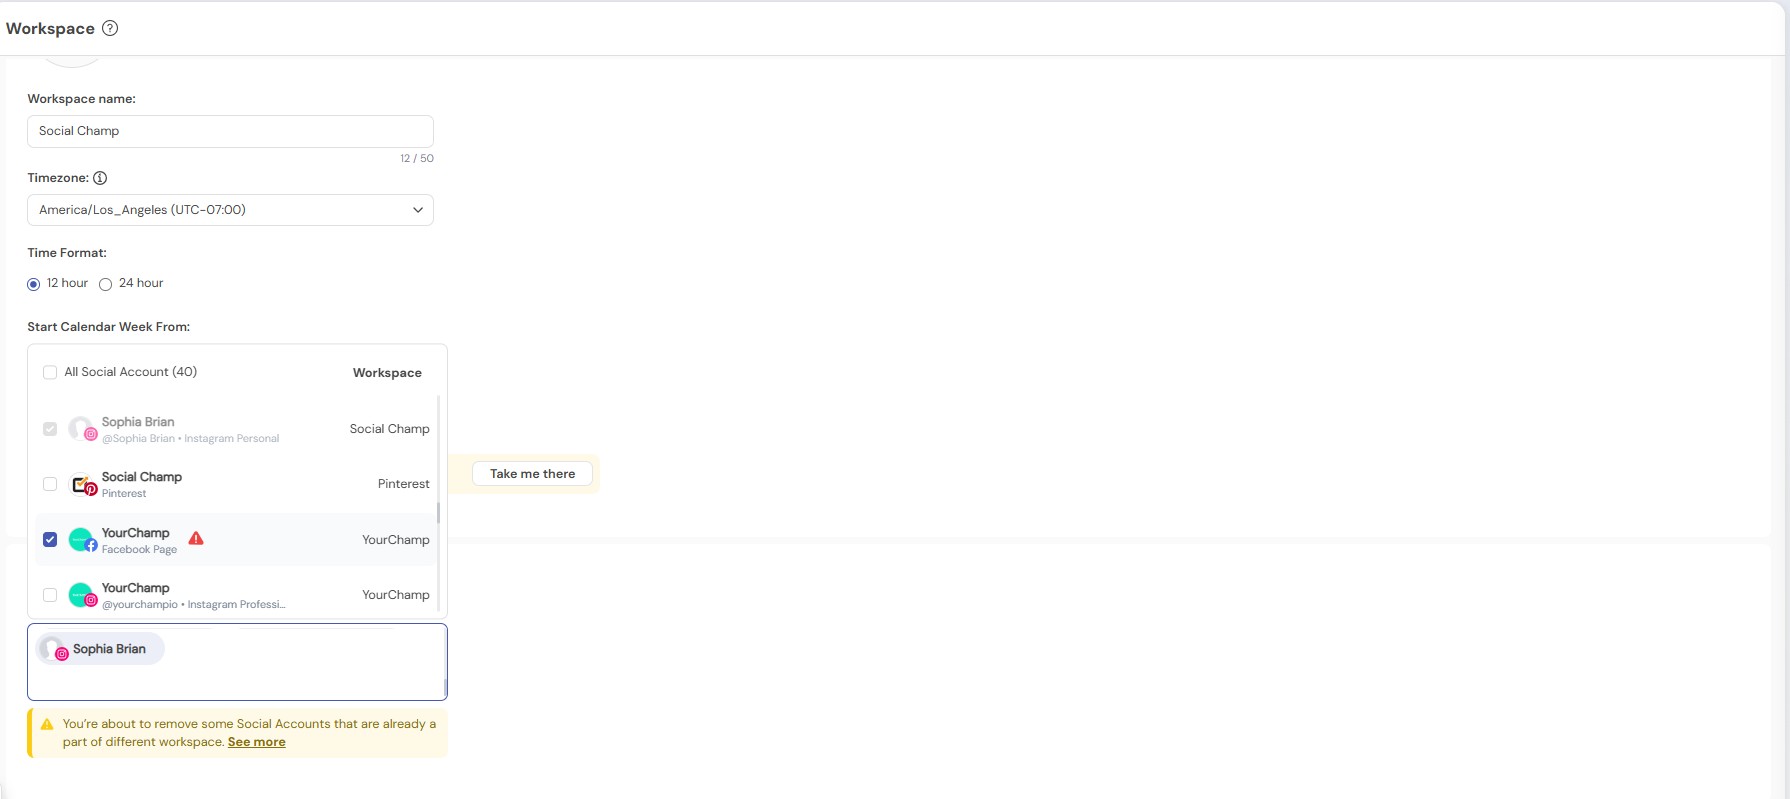
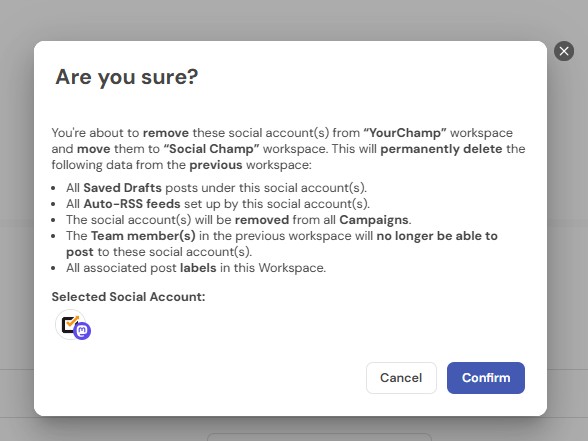
- If you want to add/move a social account from a different workspace to the current Workspace, simply tick the checkbox next to the Social Account and then click on save WorkSpace.
Please note: A Social Media account can only be present in ONE Workspace at a time. If you’re moving a Social Media account from one Workspace to another, a Red error icon will show up. Click the icon to view some important details. They are as follows:
* All Saved Drafts posts under this social account(s).
* All Auto-RSS feeds set up by this social account(s).
* The social account(s) will be removed from all Campaigns.
* The team member(s) in the previous Workspace will not be able to post to this social account(s) anymore.
- You can change the Team members added in the Workspace. Clicking the drop-down, you can see all the team members added to the account. The team members with the ticked checkboxes are connected to the current Workspace. If you want to add another team member to the Workspace, tick the checkbox next to the team member’s name.
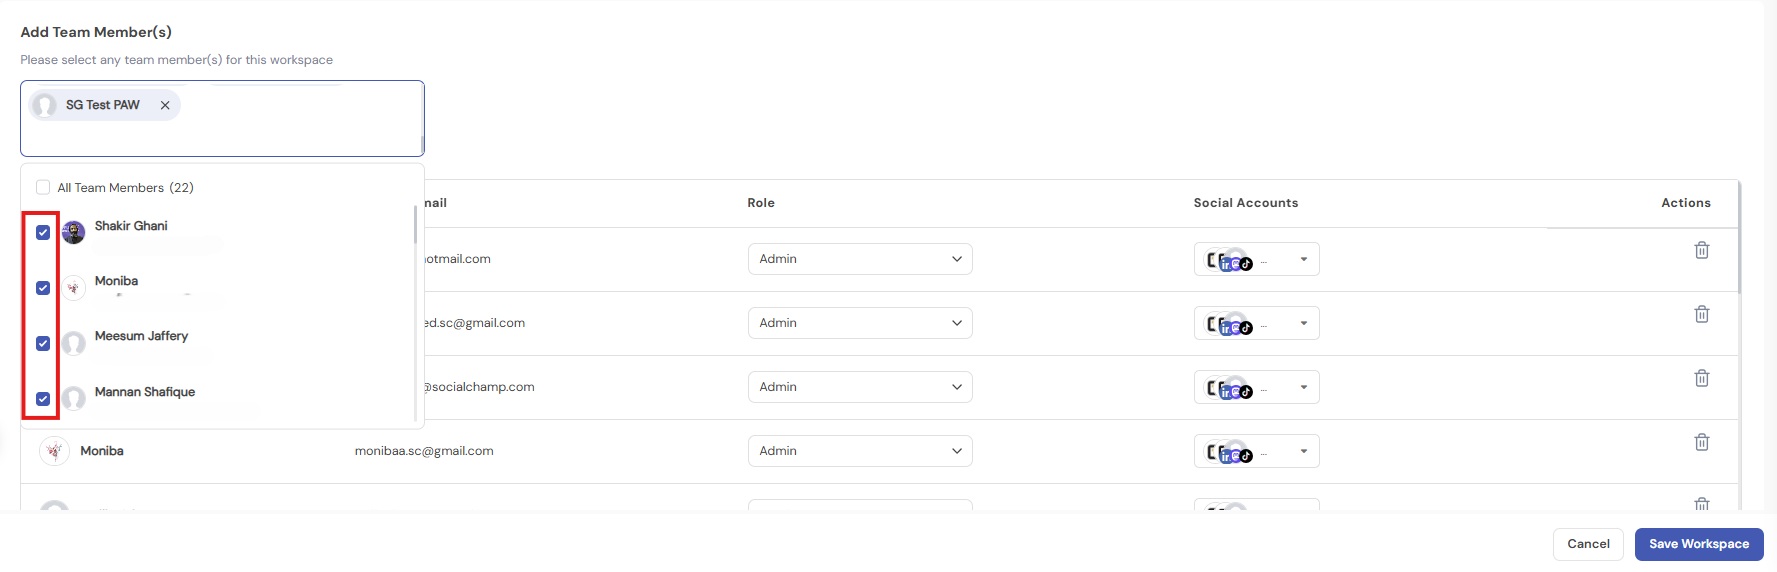
- The 4th box allows you to manage team members by assigning them their roles and seeing which Social Media accounts they can interact with.
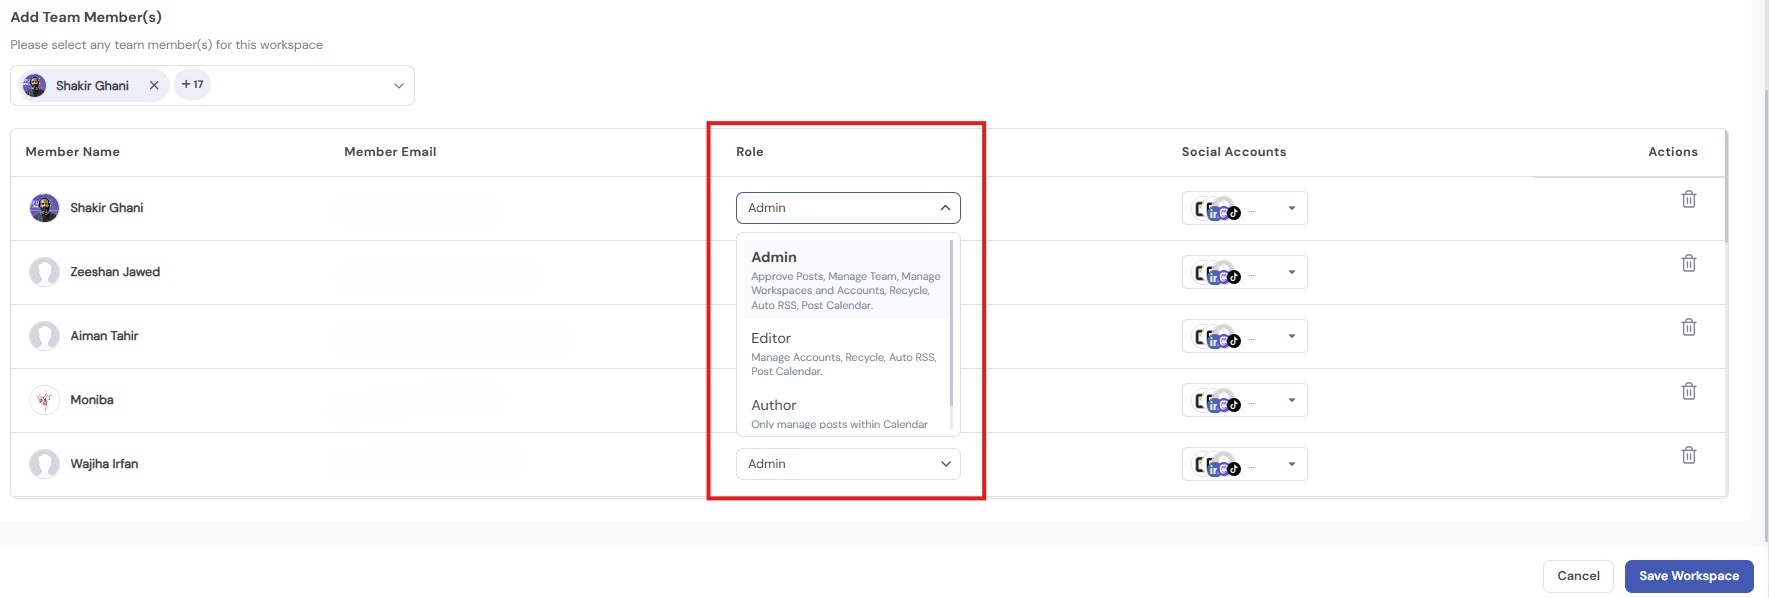
Please note:- The Admin team member can Approve posts, Manage the Team, Manage Workspaces and Accounts, Recycle, Auto-RSS, and Post Calendar.
- The Editor team Members will be able to Manage Accounts, Recycle, Auto-RSS, and Post Calendar.
- The Author role Team Member Only manages posts within the Calendar and cannot approve posts.
You can select the Social Accounts the Author can interact with by ticking the checkbox and opt-in for Post Approvals for those selected Social Media accounts by switching the toggle on.
Once everything is finalized, click the ‘save workspace’ button, and you are good to go. 🙂
Great work! Now you know how to create workspaces. You can find the guide here if you want to know how to delete a Workspace.
Check out this tutorial on How to Manage Workspaces.
Adding team members to your Social Champ account enhances collaboration and streamlines your social media management. Follow this step-by-step guide Read more
Hey Champ! If you need to update the time zone for your Workspace, Social Champ has you covered. Follow these Read more
Social Champ allows you to assign roles to your team members, allowing you to collaborate with your colleagues in a Read more
Social Champ allows you to assign roles to your team members, allowing you to collaborate with your colleagues in a Read more