
With Custom Fields, you can insert personalized `{{key}}` tokens into your posts that automatically get replaced with the correct value for each social profile at publish time. This works perfectly for things like store addresses, promo codes, or account-specific links that change from profile to profile.
Custom Fields support multiple profiles at once, so you can add, edit, or update a field across all your selected accounts in a single action instead of repeating the process one profile at a time. Let’s walk through how it works.
Adding a Custom Field Across Selected Profiles
- Navigate to the Content Publish Dashboard and select Custom Field button from the toolbar.
- Click on ”Add a New Custom Field”.
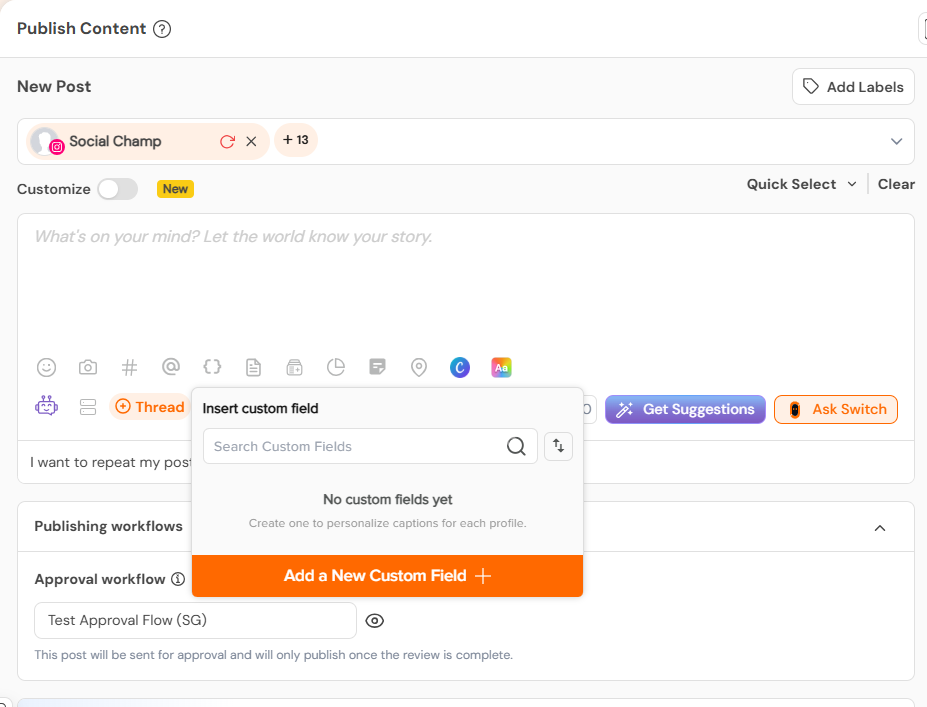
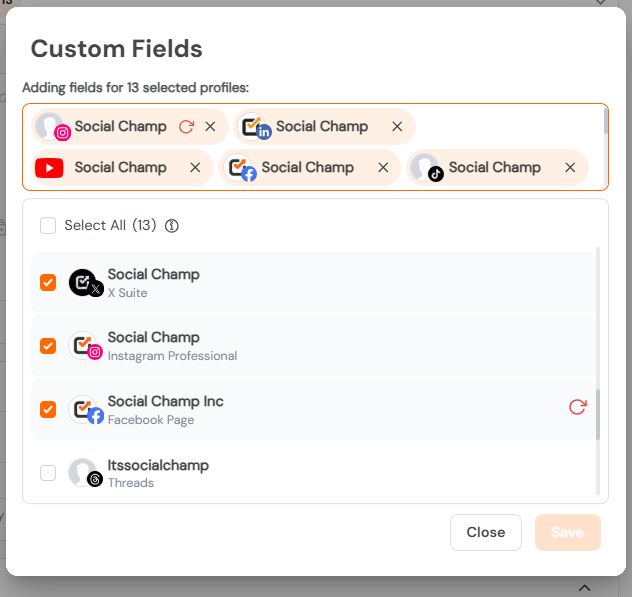
- Choose the social media profiles on which you would like to apply the custom field.
- Enter the field key/Name (e.g. store, address`) and the value against each field.
- Click Save to apply the change across all selected profiles.
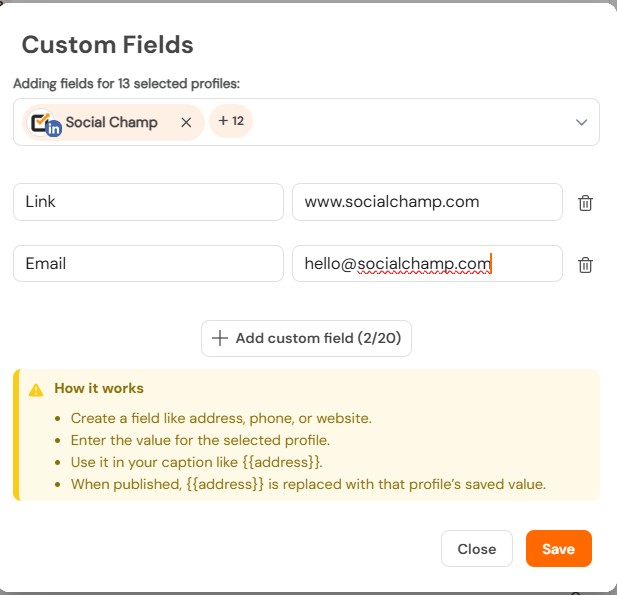
Note: You can add max of 20 Custom fields. - To edit or delete a Field’s Value, click the edit or delete icon next to a field to update its value for a specific profile, right from the picker, without leaving the composer.
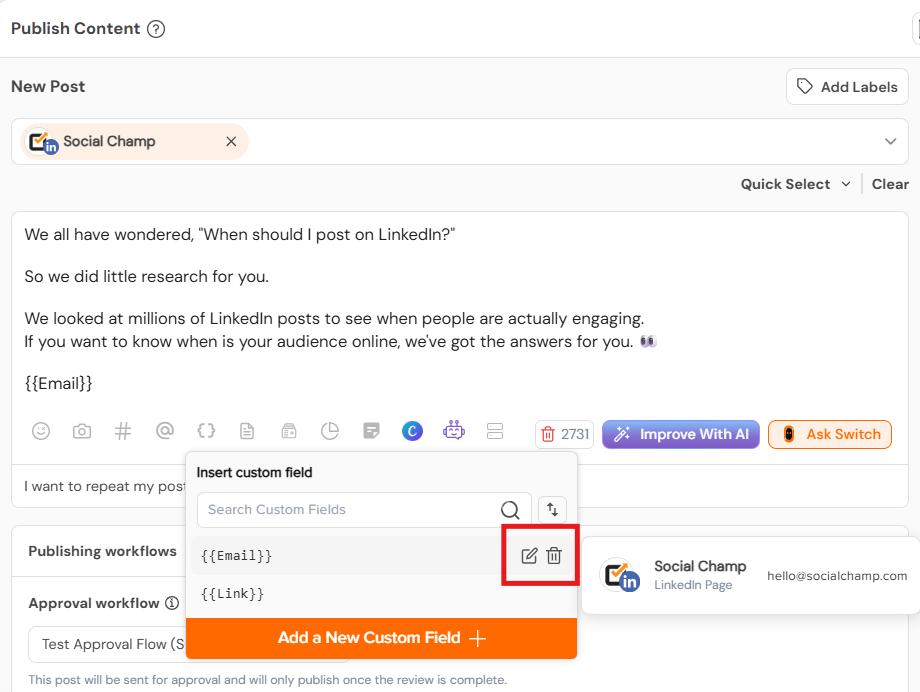
Adding the Custom Field in the Publish composer
- Log into your Social Champ account. On the left sidebar, click on Publish.
- Select the Social Account(s) you want to work with, you can select a single profile or multiple at once.
- In the composer, click on Custom Field tab.
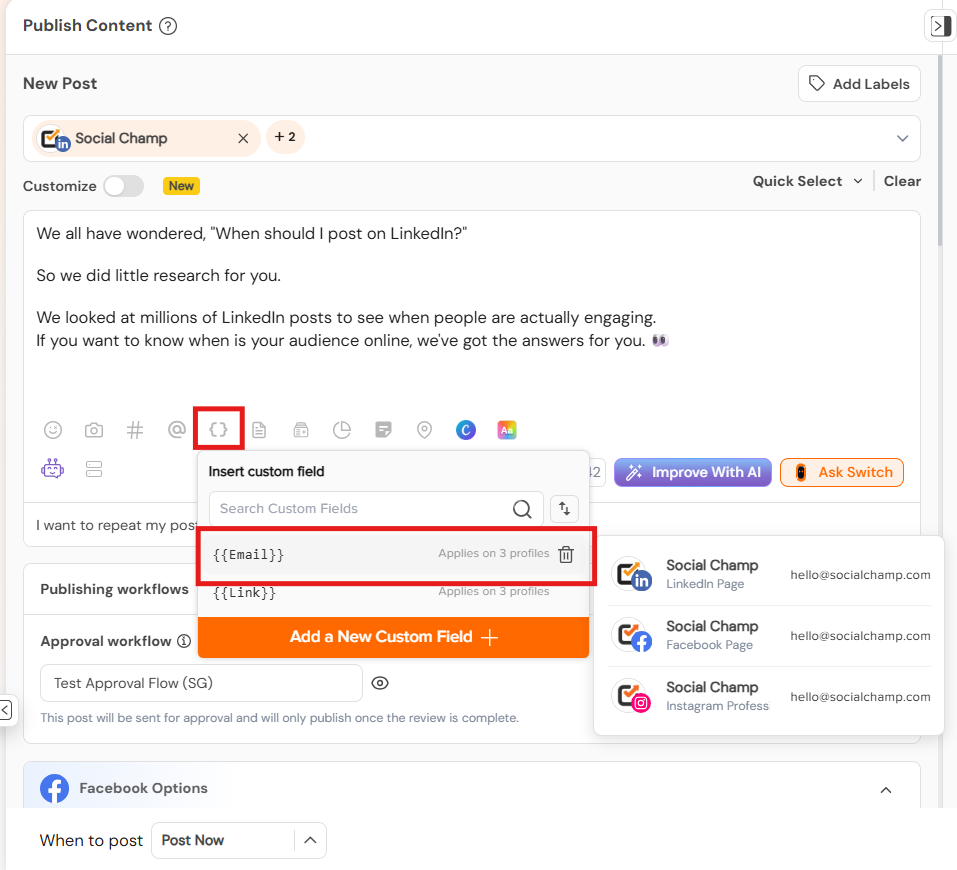
- Now Click the **Custom Fields** icon in the composer toolbar or type the field name with {{Filed Name}}.
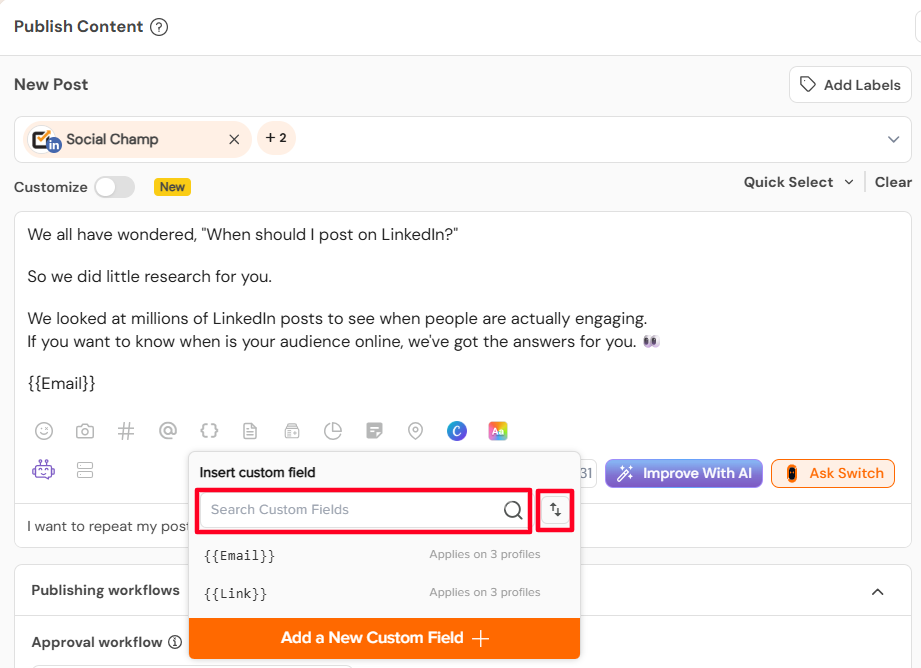
– Use the search bar to quickly find a field by name.
– Sort the list A–Z or Z–A to browse alphabetically.
- The field will be applied to all the social profiles that you have saved the field for and creating the post for.
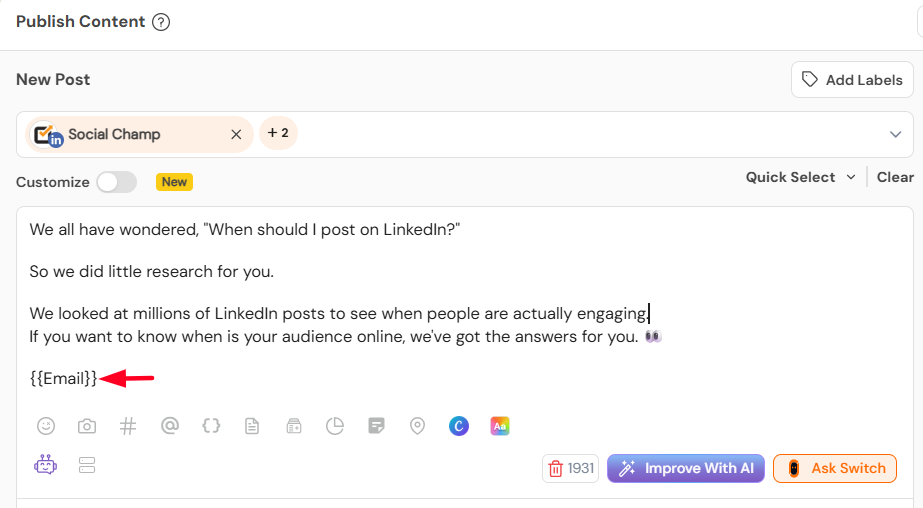
Note: If you’ve selected a single account, the field is added or edited just for that profile, as before.
If you’ve selected multiple accounts, the same dialog lets you add the field to all of them at once, no need to repeat the steps per profile.
Publish Your Post
Once your content and custom fields look right:
- Review the Post Preview for each selected profile.
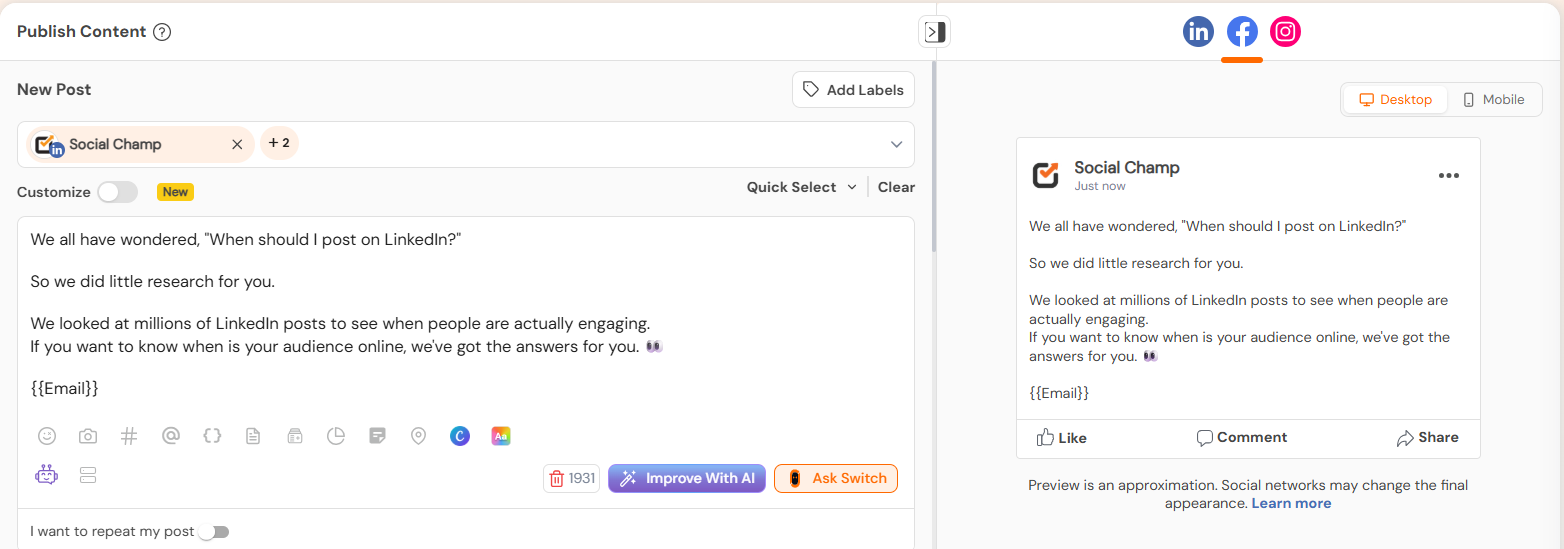
- Click Publish Now or schedule it for later.
At publish time, every `{{key}}` token is automatically substituted with the correct value for each profile.
Note: Custom field changes only affect new edits going forward. Posts that were already scheduled before a field was updated will publish exactly as they were originally set up.
Great work, now you know how to add custom fields in your Social Champ account.
Get the Support you need
Having trouble? Got a question? We’re here to support you every step of the way. Simply email us at [email protected] and we’ll get back to you.
Enhance your content strategy and engage your audience with YouTube video scheduling. Follow this step-by-step guide to schedule videos on Read more
Hey, Champs! Social Champ now introduces its much-awaited feature ‘Shareable Drafts’, which allows you to share your saved scheduled posts Read more
This guide will help you schedule carousel posts (multiple images) to your Instagram Business or Creator account using Social Champ. Read more
Social Champ offers a free plan and three paid plans. The number of posts you can schedule using each plan Read more